
What Is a Webhook Endpoint? How to Set One Up in Minutes
A webhook endpoint is the public URL and code that receive event POSTs from Stripe or GitHub. What it must do, why endpoints miss events, and how to set one up.
A webhook endpoint is a public HTTPS URL, plus the code behind it, that a provider like Stripe or GitHub sends an HTTP POST to whenever something happens. To set one up, you give the provider the URL, choose which events it should send, and make sure the endpoint replies with a 2xx status quickly and checks that each request is genuine.
This guide explains what an endpoint has to do and why endpoints miss events. It also shows how to get a working one running in a few minutes, test it, and check it before you go live.
What a webhook endpoint is (and what a webhook URL is)
The terms get mixed up, but they refer to two parts of the same thing:
- The webhook URL is the address you paste into the provider's settings, such as
https://api.example.com/webhooks/stripe. - The webhook endpoint is that URL together with whatever answers it: a route in your app, a serverless function, or a hosted service.
A common pattern is one path per provider (/webhooks/stripe, /webhooks/github). Each handler then knows which signature scheme and payload format to expect.
Webhook endpoint vs API endpoint
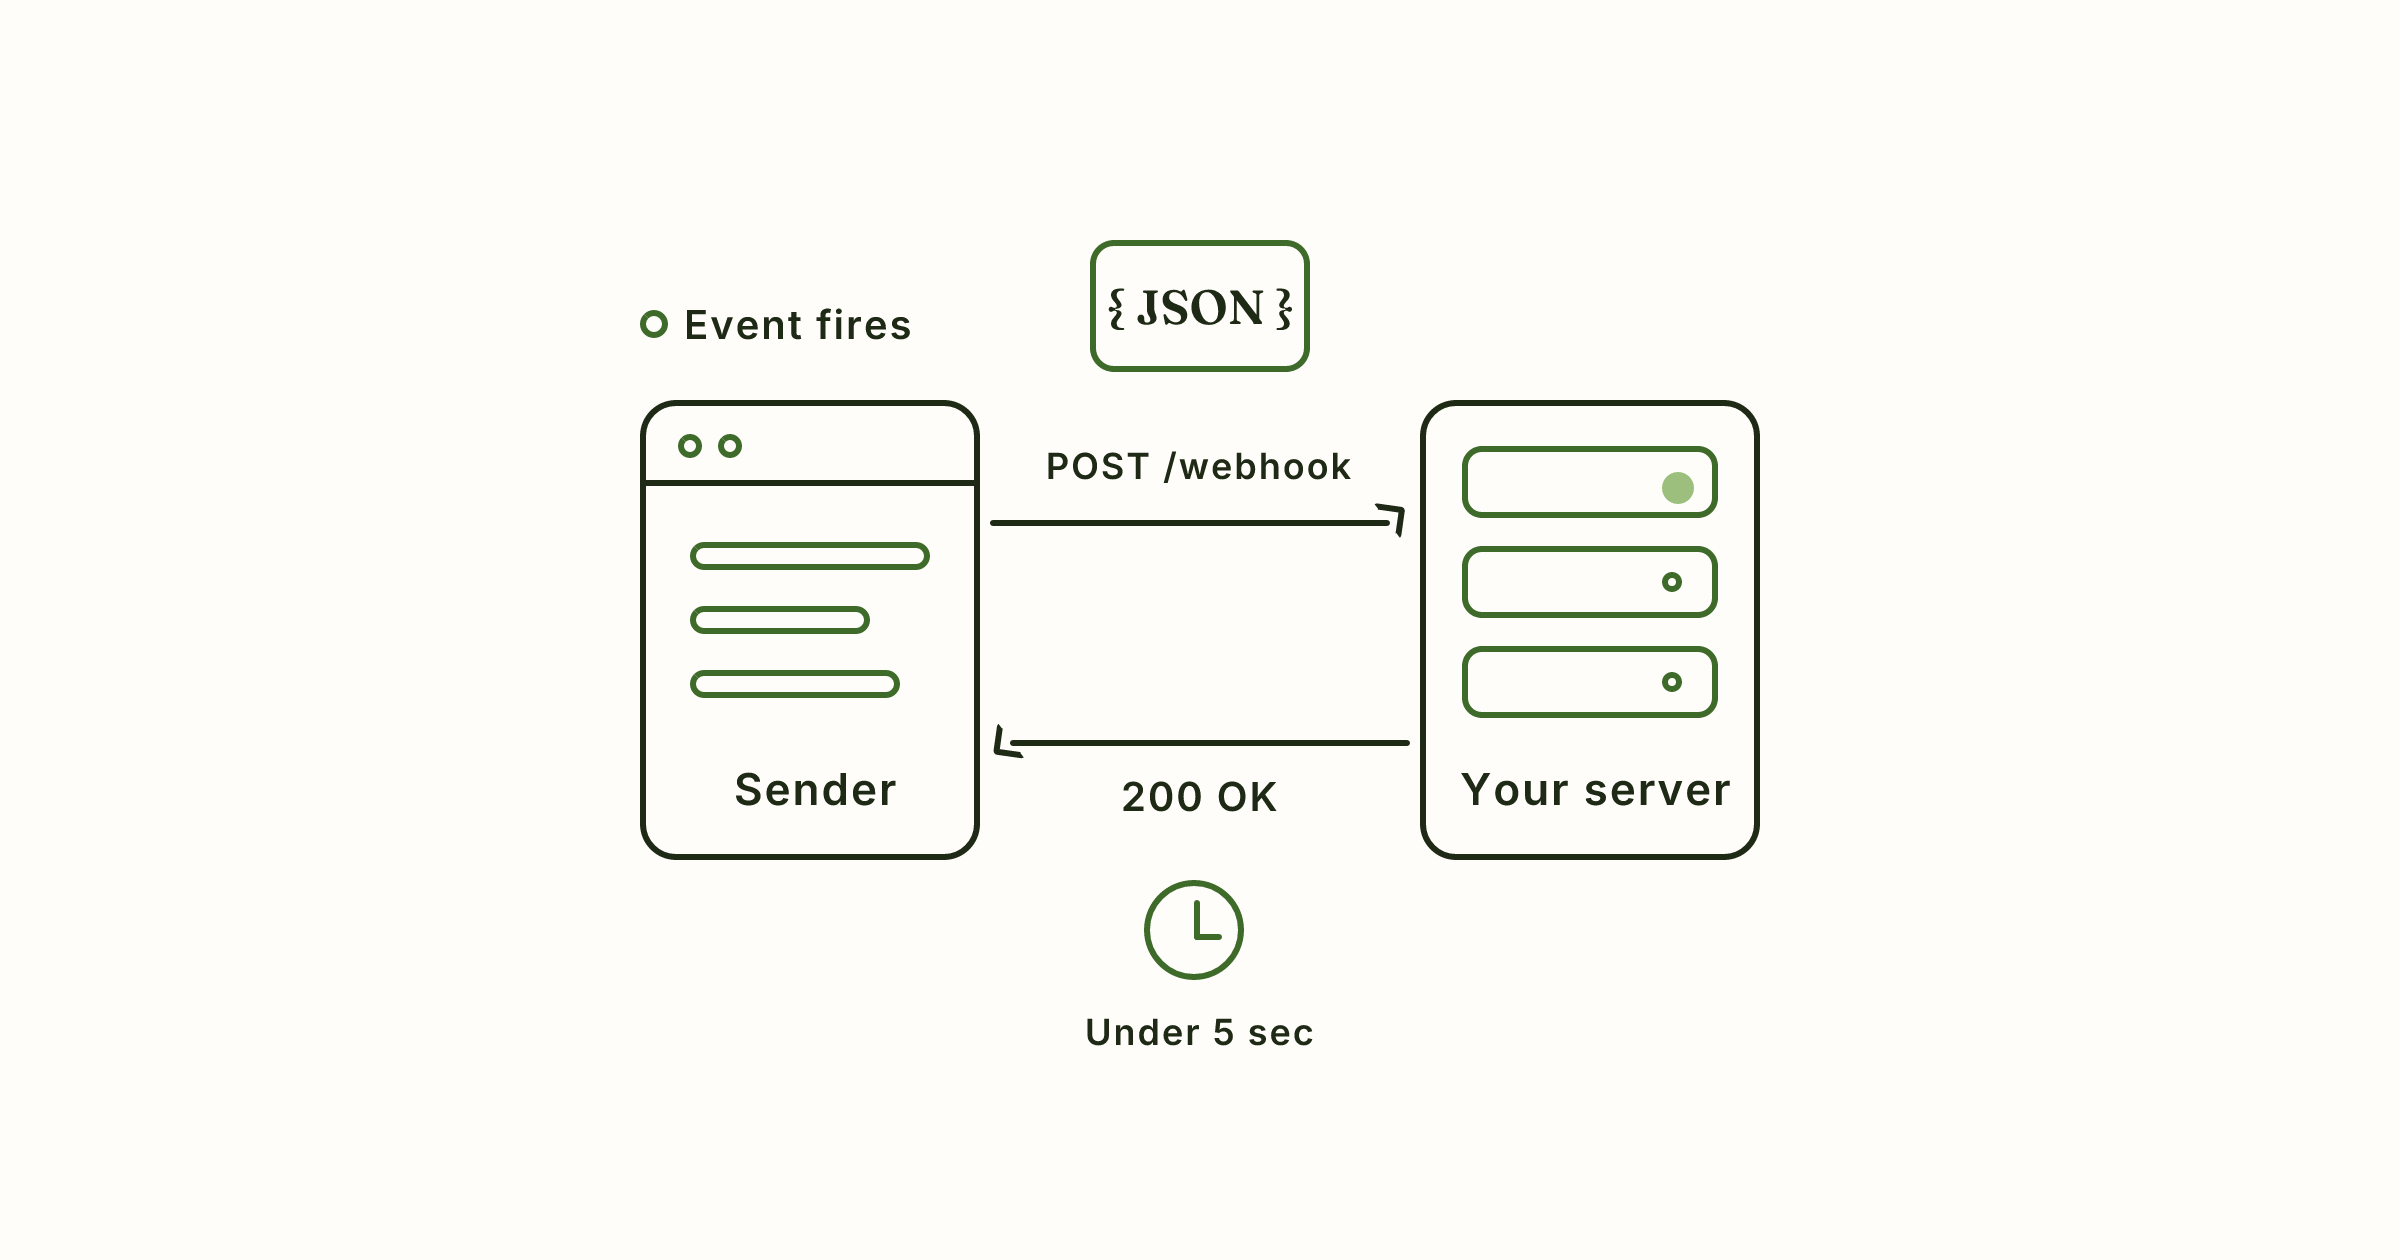
With an API endpoint, your app asks for data: it sends a request and reads the answer. A webhook endpoint works the other way around. The provider pushes data to you when an event happens. Without webhooks you would have to poll, asking the API over and over whether anything changed, which is slow and wastes requests.
How a delivery works
- You register the endpoint's URL with the provider.
- You subscribe to the events you care about, such as
invoice.paidorpush. - When an event happens, the provider sends a POST with a JSON body and headers that include a signature.
- Your endpoint replies with a 2xx status. Any other status, or no reply at all, counts as a failed delivery and is usually retried.
What a webhook endpoint must do
A working endpoint does five things. Most webhook bugs come from skipping one of them.
Accept POST over public HTTPS. The URL has to be reachable from the internet, it can't sit behind a login page, and the route has to accept POST. A route that only handles GET will reject every delivery.
Reply 2xx fast. GitHub says your server should reply with a 2XX status within 10 seconds. It suggests putting incoming payloads on a queue and processing them asynchronously. Check the request, store it, reply, and only then do the slow work.
Verify the signature against the raw body. The provider signs each request with a secret you share. The signature covers the exact bytes it sent. If your framework parses the JSON before your check runs and you serialise it again, the bytes change and a genuine request fails verification. Read the raw body on the webhook route. Our post on Stripe webhook signature verification walks through this with code.
Reject old requests. A signature proves who sent a request, not when. Someone who captures a signed request can send it again later. To prevent this, Stripe's libraries reject events whose timestamp is more than 5 minutes from the current time by default. Stripe signs each retry with a new signature and timestamp, so a legitimate retry still passes.
Handle duplicates. Retries mean the same event can arrive twice. Store each event's ID, or GitHub's X-GitHub-Delivery header. When an ID you've already handled shows up, reply 200 and do nothing. Don't reply with an error, because the sender will treat that as a failure and send the event yet again.
Here's a short Express handler for Stripe that does all five:
import express from "express";
import Stripe from "stripe";

const stripe = new Stripe(process.env.STRIPE_SECRET_KEY);
const app = express();

// Raw body on this route: the signature covers the exact bytes.
app.post("/webhooks/stripe", express.raw({ type: "application/json" }), async (req, res) => {
  let event;
  try {
    // Also rejects timestamps outside the default 5-minute tolerance
    event = stripe.webhooks.constructEvent(
      req.body,
      req.headers["stripe-signature"],
      process.env.STRIPE_WEBHOOK_SECRET
    );
  } catch {
    return res.status(401).send("invalid signature");
  }

  if (await alreadyHandled(event.id)) return res.sendStatus(200); // duplicate
  await queue.add(event);   // your job queue: do the slow work later
  res.sendStatus(200);      // answer first
});
Why endpoints on a laptop or a sleeping server miss events
During development, your handler runs at localhost:3000, which only points at your own machine. Stripe can't reach it. In production, a deploy, a crashed process or a server that's asleep has the same effect: the provider gets no answer.
Retries cover some of these gaps, but not forever. In live mode, Stripe retries failed deliveries for up to three days with exponential backoff. In a sandbox, it retries only three times over a few hours. After that you're left with manual resends. Stripe lets you resend an event from the Dashboard for up to 15 days after it was created, or with the Stripe CLI for up to 30 days. Many providers also flag or disable an endpoint that keeps failing.
The fix is an endpoint that answers even when your code isn't running, and that keeps a copy of every request so you can feed it to your handler later.
Set up an always-on webhook endpoint
If you just need a URL right now, the OtterKit try page gives you a live webhook URL in the browser, with no account. It lasts 30 minutes, captures up to 50 requests, and answers every request with 200 and {"received":true}. That's enough to point a provider at it and read what the provider sends. The URL is public, so use test mode and dummy data.
For an endpoint that stays up, log in once and create one from the terminal:
npx otterkit login
npx otterkit webhook --daemon --subdomain stripe-dev --ttl never
# https://stripe-dev.otterkit.app
--subdomainreserves the name, so the URL stays the same across restarts and you never have to update the provider's settings.--daemonruns the endpoint in the background.--ttl neverkeeps it running until you stop it. The default is 24 hours.
OtterKit's servers answer the provider, so nothing on your machine has to be running. If your laptop is closed when an event fires, the provider still gets its reply and the request is held for you until you reconnect. An endpoint costs 1 credit ($0.01) per hour while it's live and never more than $3 in any 30 days. New accounts get 10 free credits.
CLI endpoints save every request to ~/.otterkit/requests/<subdomain>.jsonl, and those captures stay on your machine.
Get events to your local code
There are three ways to get captured events to your handler:
# Mirror every capture to your local server
npx otterkit webhook --deliver 3000

# Re-send a captured request to localhost after a fix
npx otterkit replay stripe-dev --target 127.0.0.1:3000
--deliver is for local development. If your app crashes, the sender still gets its 200 and the request stays in the log. For a server that should receive events even while your laptop sleeps, set up a forwarding rule. It sends matching events on to your URL, signed and retried, and can reshape them the way your code wants. Replaying is free, so you can send the same real event to your handler as many times as you need without triggering a new payment. For the full local workflow, including tunnels that point straight at your port, see how to test webhooks locally.
Custom responses, custom domains and security
Custom responses. Some providers want a specific reply before they'll send anything. Slack's URL check, for example, wants its challenge echoed back, and one response rule handles that. Other replies are worth testing too, such as slow or failing ones. You can set the status, body, headers and a delay of up to 10 seconds, or add rules that match a path or a JSON field:
# Wait 2 seconds before answering
npx otterkit webhook --respond-delay 2000

# Fail one path with a 500 to watch the sender retry
npx otterkit webhook --respond-match path=/flaky --respond 500
Your own domain. You can give the provider hooks.your-company.com instead of an .otterkit.app address. Point the domain at an endpoint with one CNAME record, and the certificate is issued and renewed automatically. The steps are in the custom domains docs.
Signature checks on arrival. Give the endpoint your signing secret and every request is marked valid, invalid or missing:
npx otterkit webhook --verify stripe:whsec_abc123 --deliver 3000
There are 16 provider presets, including Stripe, GitHub, Shopify, Slack, Svix, Paddle, Linear and Twilio. The verdict reaches your local server as an X-OtterKit-Verified header. Checking never blocks a request; it only tells you which ones to trust. Keep your own check in your handler as well.
Two more habits from GitHub's best practices are worth following with any provider: subscribe only to the events you need, and allow only the provider's published IP addresses where your setup permits it. Every option is listed in the webhooks docs.
Test your endpoint with Stripe, GitHub and Shopify events
Real events. In Stripe, add the endpoint while in test mode and make a test payment. In GitHub, set the payload URL in the repository's webhook settings. GitHub sends a ping event when you save, so that's usually the first request you'll see. Shopify works the same way through its webhook settings.
Signed events with no provider account. otterkit send fires a correctly signed event straight at your handler:
npx otterkit send stripe:payment_intent.succeeded 127.0.0.1:3000/webhooks/stripe --secret whsec_...
Built-in events cover Stripe, GitHub, Shopify and Slack, so you can exercise each handler without a dashboard or a test account.
Is the check wrong or the payload? OtterKit can check the signatures on your captured requests against a secret, locally. If they fail with the correct secret, your code isn't verifying the raw bytes or something changed the body on the way. If they all pass, the bug is in your handler.
In CI, otterkit await waits until the request you expect arrives, then exits 0. That lets a test trigger an event, wait for it and check the result.
Webhook endpoint checklist before going live
- The URL is public HTTPS, has no login in front of it, and the route accepts POST
- The handler replies 2xx within the provider's limit (10 seconds for GitHub) and queues slow work
- The signature is checked against the raw body, with the right secret for this environment (test and live secrets differ)
- Timestamps outside your tolerance window are rejected
- Event or delivery IDs are stored, and duplicates get a 200 with no further action
- The handler checks the event type, and the action where there is one, before acting
- Body-size limits on your server and proxy can take the largest payload you expect
- You're subscribed only to the events you handle
- Something answers and keeps requests during deploys and downtime
- You know how to resend missed events (dashboard, CLI or your own captures)
- You've tested a slow reply, a 500 and an unsigned request, not just the happy path
FAQ
Is a webhook URL the same as a webhook endpoint? Almost. The URL is the address. The endpoint is the address plus whatever receives requests at it. In everyday use the terms mean the same thing.
Can a webhook endpoint be localhost? Not directly, because providers can't reach your machine. Use a public URL that forwards to your port, or capture events on a hosted endpoint and replay them to localhost.
What status code should a webhook endpoint return? Return a 2xx as soon as the event is safely received. Use a 4xx only when you want the sender to know the delivery was rejected, such as for a bad signature.
Do I need to run a server to have a webhook endpoint? Not for receiving and storing events. A hosted endpoint answers the provider and keeps the requests. You only need your own code running to act on the events, and you can mirror, forward or replay them to it.
How long will a provider retry if my endpoint is down? It depends on the provider. Stripe retries for up to three days in live mode but only three times in a sandbox, so check your provider's docs and don't rely on retries alone.
Stripe Webhook Signature Verification, Explained with Code
How Stripe's webhook signature works, where to find your whsec signing secret, and how to verify it in Node and Python without the usual raw-body errors.
How Do Webhooks Work? A Hands-On Explanation
How webhooks work, step by step: the HTTP request, payload and headers, retries, timeouts and signature checks, plus a live URL to watch one arrive.
Free Webhook Tester: Get a Live URL and Inspect Requests
Get a live webhook URL in your browser with no account. Send test events from Stripe, GitHub or curl, read headers and bodies, and replay them to localhost.